I got into printmaking last Autumn when I enrolled on a course to learn more about different printmaking techniques. It is such a wonderful art form, and the more you dive in, the deeper and deeper you can go – it’s such a massively huge area, spanning centuries and continents!
I thought I would try to distill what I have learned over the last year, to help anyone looking to explore printmaking themselves.
A Brief History of Printmaking
Printmaking has played a significant role in the development and dissemination of art, culture, and knowledge. We can trace its origins back to ancient times, with early forms of printmaking emerging in China around the 2nd century CE. These early techniques, such as woodblock printing, involved carving images onto wooden blocks and then applying ink to transfer the image onto paper or fabric.
Printmaking techniques were further developed in Europe. The 15th century invention of movable type by Gutenberg changed printing forever, with the Gutenberg printing press enabling the spread of knowledge and ideas.
During the Renaissance, printmaking experienced a golden age, particularly in Europe. Artists such as Albrecht Dürer, Rembrandt van Rijn, and Francisco Goya used printmaking techniques to create intricate and detailed works of art. Engraving, etching, and drypoint became popular techniques, allowing artists to achieve a wide range of textures and tonal effects.
Printmaking continued to evolve and diversify in the modern era. With new techniques like lithography and screen printing emerging, offering artists even more possibilities for creative expression. The 20th century witnessed a surge of experimentation and innovation in printmaking, with artists like Pablo Picasso, Henri Matisse, and Andy Warhol pushing the boundaries of the medium and exploring new techniques and concepts. have a look at some famous printmakers and their prints here for some inspiration.
The importance of printmaking lies in its ability to make art accessible to a wider audience. Unlike unique paintings or sculptures, prints can be reproduced in multiples, allowing more people to experience and own artworks. Printmaking also enables artists to explore different stylistic approaches and experiment with various materials, resulting in a diverse range of artistic expressions.
Printmaking remains popular in the art world today, offering versatility and accessibility for all levels of artists..
Accessibility of Printmaking
Accessibility is another significant aspect of printmaking, making it an ideal art form for beginners:
- Minimal Equipment: While professional printmaking studios may have specialized equipment, many printmaking techniques can be practiced with minimal tools and materials. Beginners can start with relief printing using linoleum blocks, brayers, basic carving tools, and water-based inks, which are relatively affordable and accessible.
- Learning Resources: Various books, online tutorials, workshops, and classes are available to support beginners in learning the basics of printmaking. These resources provide step-by-step instructions, tips, and techniques, making it easier for beginners to learn the necessary skills and knowledge for their printmaking journey.
- Experimentation and Growth: Printmaking encourages experimentation and exploration. As a beginner, you have the freedom to try different techniques, materials, and approaches to find your own unique style. The learning process itself becomes an exciting journey of discovery and growth.
Different Types of Printmaking Techniques and Their Characteristics:
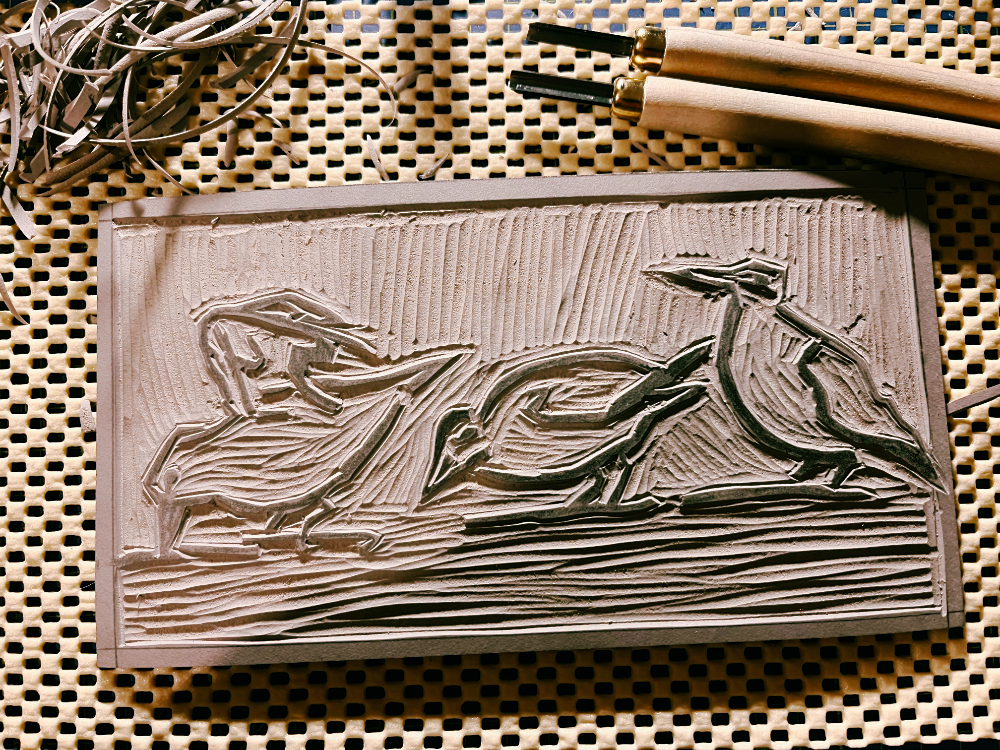
- Relief Printing:
- In relief printing, the image is carved or etched onto a block or plate, leaving the raised surface to be inked and transferred onto paper.
- Common relief printing techniques are linocut and woodcut, where the image is carved into a block of wood or linoleum.
- Relief prints often have bold, graphic qualities with distinct lines and textures.
- Intaglio Printing:
- Intaglio techniques involve incising or etching lines or images into a plate, which is then inked and wiped, leaving ink only in the incised areas.
- Common intaglio techniques include engraving, drypoint, etching, and aquatint.
- These techniques allow for finer details, tonal variations, and a wide range of textures.
- Famous printmakers using intaglio include Rembrandt van Rijn, Francisco Goya, and Albrecht Dürer.
- Lithography:
- Lithography is a planographic technique based on the principle that oil and water repel each other.
- An image is drawn or transferred onto a flat surface (usually a stone or metal plate) using greasy materials.
- The plate is then chemically treated to fix the image, and ink is applied to the surface, adhering only to the greasy areas.
- Lithography allows for fine lines, tonal transitions, and a wide range of mark-making possibilities.
- Prominent lithographers include Henri de Toulouse-Lautrec and Edvard Munch.
- Screen Printing:
- Screen printing involves pushing ink through a stencil attached to a mesh screen onto the printing surface.
- The stencil can be made of various materials, such as paper, fabric, or photographic emulsion.
- Screen printing is known for its versatility, allowing for vibrant colors, layering, and experimentation with different surfaces.
- Artists like Andy Warhol and Roy Lichtenstein popularized screen printing in contemporary art.
Tools and Materials Used in Printmaking:
- Carving Tools: Used in relief techniques, carving tools, such as gouges and chisels, are used to carve or cut the image into the block or plate.
- Printing Press: A printing press applies pressure to transfer the inked image from the plate or block onto paper. Different types of presses, including etching presses and lithographic presses, are used based on the technique.
- Inks: Printmaking inks come in various types, such as oil-based, water-based, or solvent-based, depending on the technique and desired effects. Inks are available in a wide range of colors and consistencies.
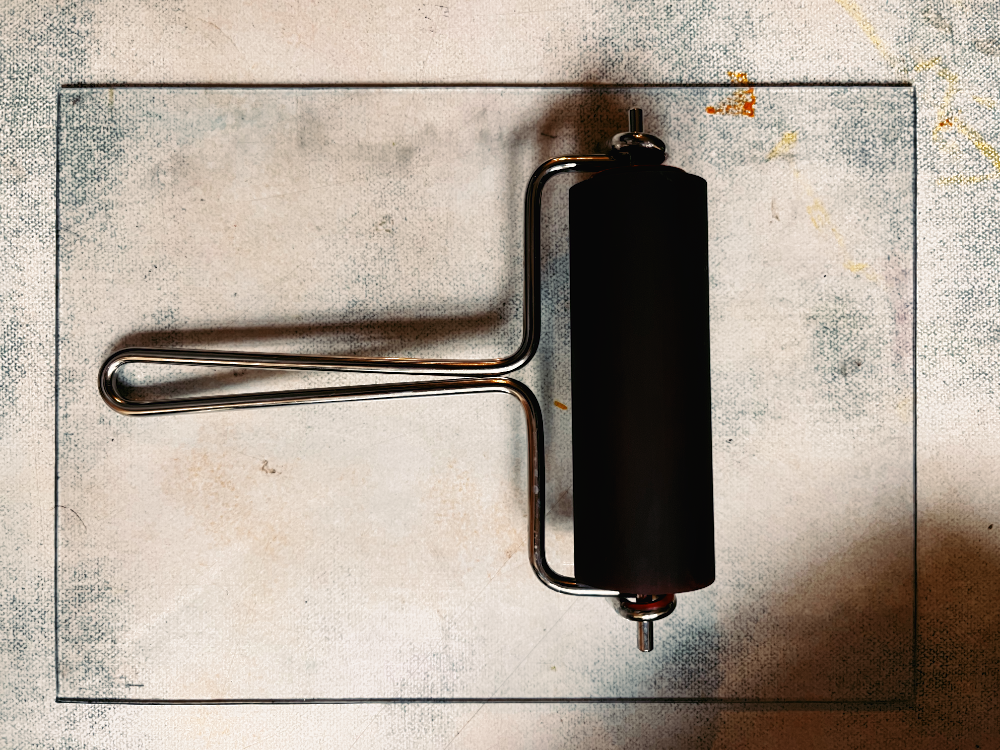
- Brayers and Rollers: Brayers or rollers are used to apply ink evenly to the printing surface. They come in different sizes and materials like rubber or soft rubber.
- Plates and Blocks: Plates and blocks serve as the surface onto which the image is carved, etched, or drawn. They can be made from wood, linoleum, metal, stone, or other materials based on the technique.
- Screens and Stencils: In screen printing, screens made of mesh and stencils made of various materials are used to create the image or design. Screens are stretched over frames, and stencils are attached to the screen to define the inked areas.
- Paper and Substrates: A variety of papers and substrates can be used in printmaking, including traditional printmaking paper, handmade paper, fabric, and even unconventional surfaces like wood or metal.
Step by Step Guide for Setting Up Your Printmaking Workspace
Setting up your printmaking workspace involves selecting an appropriate space, gathering required equipment, and maintaining an organised and clean environment.
- Select a Suitable Space:
- Choose a well-ventilated area with sufficient natural or artificial light.
- Consider the size of the space, ensuring it can fit all your equipment and lets you move around freely.
- Ensure the space is easily accessible and allows for proper ventilation to minimise exposure to fumes.
- Gather Necessary Equipment:
- Printing Press: If you are using a press, ensure it is properly installed and calibrated in a stable location.
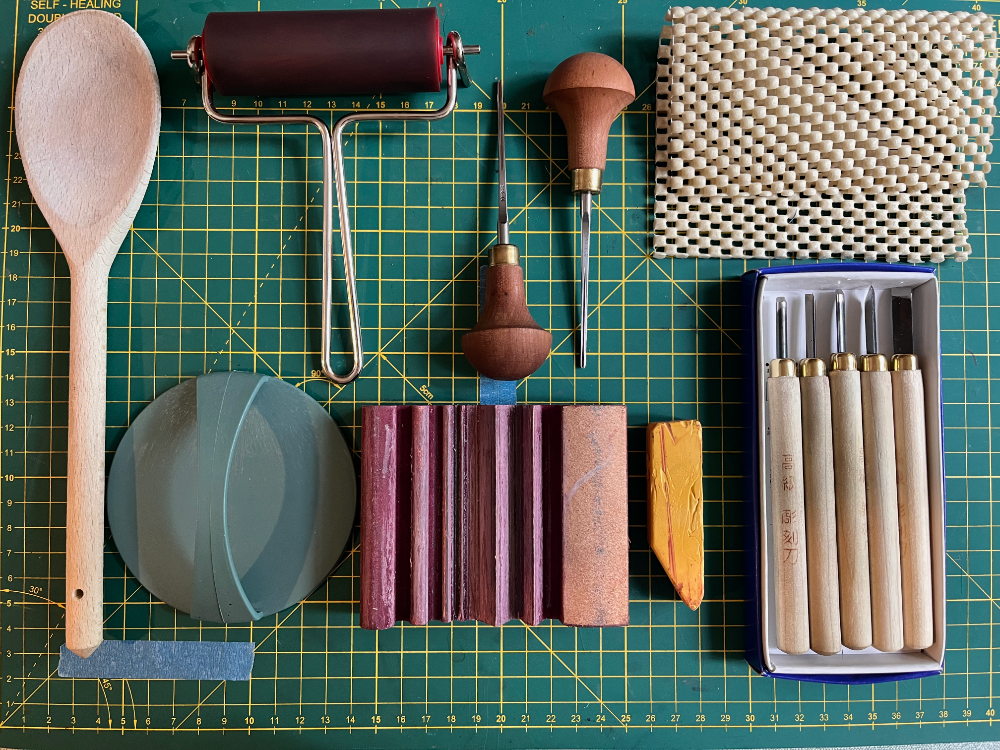
- Carving Tools: Acquire a set of carving tools suitable for your chosen printmaking technique, such as gouges and chisels for relief printing. I recommend the basic chinese woodcarving tools available from Handprinted and photo
- A selection of high-quality inks appropriate for your chosen technique. I have a basic selection of Caligo Safe wash inks, which are great because they stay wet for a while so you don’t have to rush your printing, but they also wash off with water – so an easy clean up!
- Various sized Brayers and Rollers – Handprinted UK have a great selection to get you started.
- Paper: Choose appropriate printmaking papers based on your technique and desired results.
- Other Tools and Materials: Consider additional items such as cleaning supplies, rags, and protective gear.
- Organize and Arrange:
- Create designated storage areas for tools, inks, papers, and materials. Shelves, drawers, or cabinets can help keep things organised.
- Label containers and shelves to easily locate specific items.
- Arrange your workspace logically, placing tools and materials within easy reach to optimize workflow.
- Consider creating separate stations for different stages of the printmaking process, such as carving, inking, printing, and cleaning.
- Ensure Safety:
- Familiarise yourself with safety guidelines specific to your chosen printmaking technique – this can be as simple as making sure you always carve away from your hands – using a non slip mat under your plate is always advisable too!
- Minimize exposure to fumes – make sure you have a window open for good ventilation if using chemicals.
- Wear appropriate protective gear, such as gloves, aprons, and safety glasses, when handling inks, solvents, or chemicals.
- Follow local regulations for the proper storage and disposal of hazardous materials.
- Maintain a Clean Workspace:
- Regularly clean your workspace, removing excess ink, debris, and waste materials.
- Keep cleaning supplies readily available for maintaining your tools and workspace.
- Personalize and Optimise:
- Customise your workspace based on your specific preferences and needs.
- Consider adding inspirational artwork, reference materials, or a bulletin board to keep track of ideas and techniques.
- Continuously assess and improve your workspace to enhance workflow efficiency and inspire creativity.
Remember, adapt the setup instructions based on your chosen printmaking technique and available resources. Setting up an organised and functional printmaking workspace enhances your creative process and allows you to fully explore the art of printmaking!
Choosing a Printmaking Technique
I would encourage you to explore different techniques and start with one that resonates with your style. While relief, intaglio, lithography, and screen printing all have their merits, relief printmaking is often recommended for beginners due to its accessibility and affordability. Relief printing allows for bold and graphic results with distinct lines and textures, making it a great starting point for experimenting with image-making and understanding the fundamentals of printmaking. It also requires minimal equipment and can be practiced with basic carving tools, making it more budget-friendly for beginners.
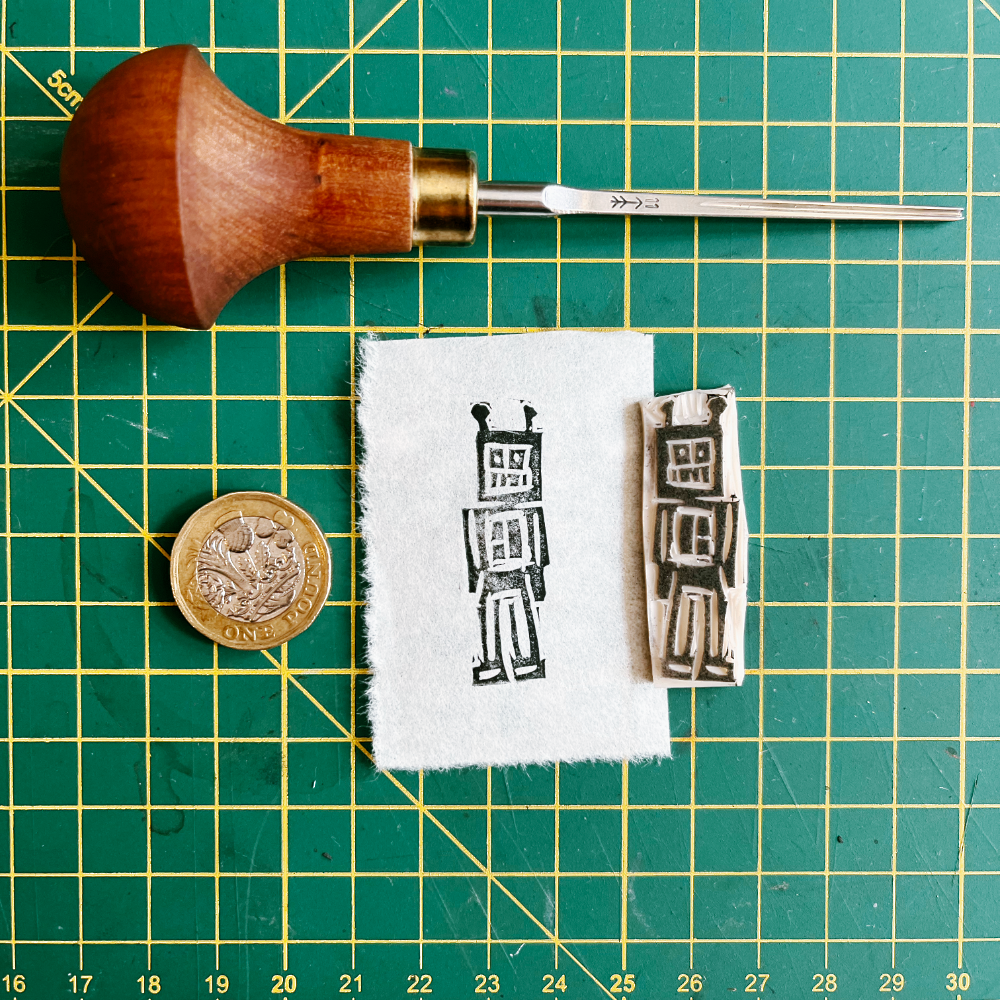
Try joining in with something like the Tiny Print Tuesday hashtag challenge on Instagram – started by the talented @Flintcat, it is a really fun weekly challenge to carve and print a tiny print, and post to instagram using the hashtag #TinyPrintTuesday – I am on my third week now, and am finding it really helpful to keep me going with printmaking. The regular weekly practice is also helping me hone my skills, and think about what I can make, but above all it is really fun to do, and inspiring to see what others are creating!
Gather your Materials
Yay! Time for some art supply shopping! Gathering materials for your chosen printmaking technique is an important step in setting up your printmaking workspace. Here is a short summary that includes a list of materials, suggestions for trusted suppliers, and tips for budget-friendly alternatives:
- List of Materials:
- Carving Tools: Gouges, chisels, or carving knives for relief printing.
- Printing Press: If applicable to your chosen technique.
- Inks: Select appropriate inks based on the technique (oil-based, water-based, or solvent-based).
- Brayers and Rollers: For even ink application.
- Plates or Blocks: Woodblocks, linoleum blocks, metal plates, or other surfaces for printing.
- Paper and Substrates: Printmaking paper or alternative substrates for printing.
- Screens and Stencils: If using screen printing.
- Cleaning Supplies: Rags, brushes, solvents, and other cleaning tools specific to your technique. Wet wipes are very handy for keeping hands and surfaces clean as you go!
- Suppliers :
- Art Supply Stores: Visit local art supply stores for a wide range of printmaking materials.
- Online Retailers: Explore reputable online retailers like my favourites Jackson’s Art and Handprinted UK – these have a great selection of printmaking materials for all types of printing.
- Budget-Friendly Alternatives and Repurposing:
- Look for starter kits or beginner sets that offer a selection of essential tools and materials at a more affordable price.
- Consider repurposing common household items for certain aspects of printmaking. For example, a glass or acrylic sheet can be used as a makeshift printing plate for monotype printing, or old credit cards can work as brayers for small-scale projects, and wooden spoons make great barens .
- Explore local thrift stores or flea markets for potential materials or tools that can be repurposed for printmaking.
Remember, it’s always helpful to research and compare prices, read reviews, and seek recommendations from fellow printmakers to ensure you’re getting quality materials at reasonable prices. Don’t be afraid to experiment with alternative options or repurpose items to suit your budget.
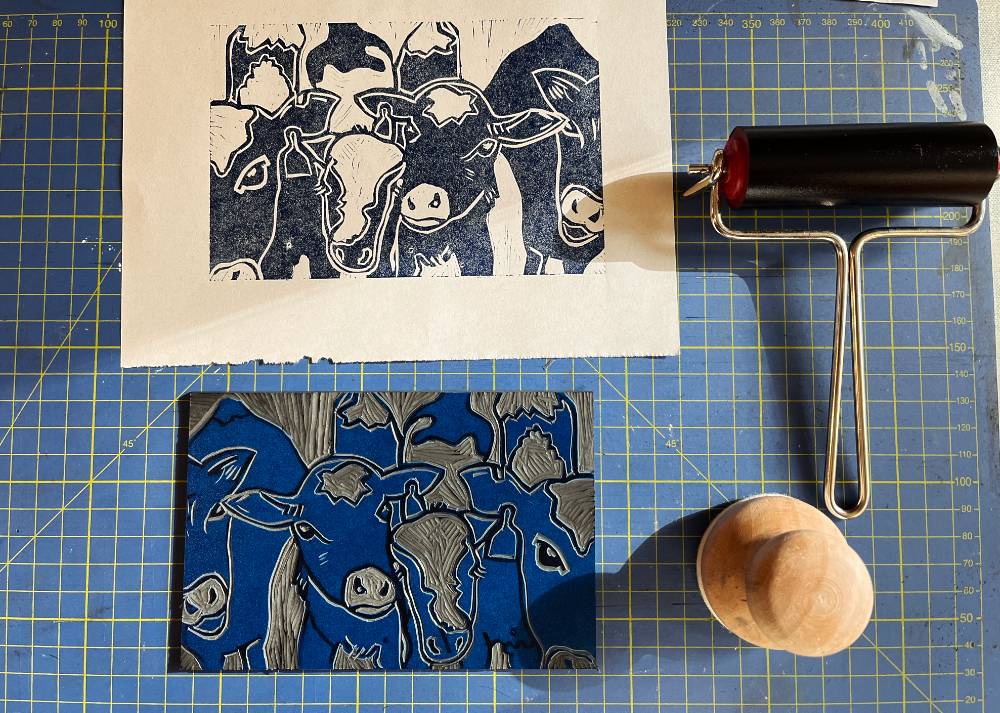
Guide to the Basics of Relief Printing
Relief printmaking is the technique I have chosen to focus on to start with. It is a versatile and accessible technique that allows you to create bold and graphic prints. Here is a step-by-step guide to help you get started:
- Image Preparation:
- Begin by sketching your design on paper. Keep in mind that the areas you leave untouched will appear as white or negative spaces in your print.
- Transfer the design onto your carving block or linoleum using tracing paper or by drawing directly onto the surface.
- Carving:
- Secure your block on a stable surface and use carving tools to remove the areas surrounding your design, leaving the design itself raised.
- Start with larger gouges to remove bulk areas and gradually switch to smaller tools for finer details.
- Take your time and carve with steady, controlled movements, keeping your fingers away from the cutting edge and carving away from you.
- Ink Mixing:
- Select oil-based or water-based relief ink in your desired colors. Oil will take longer to dry, so is great for staying workable on the plate for longer. It does take longer to dry on the paper too, so bear that in mind.
- Squeeze a small amount of ink onto your plate and use a brayer to roll it out until it forms a thin, even layer.
- Roll the ink onto the raised surface of your block using the brayer. Make sure the entire design is evenly covered.
- Printing:
- Place your block, inked side up, on a clean surface.
- Carefully position a sheet of printmaking paper on top of the block, making sure it aligns properly.
- Apply even pressure on the back of the paper using a barren, a wooden spoon, or a printing press.
- Gently lift the paper from one corner to check the print. If necessary, adjust the pressure or ink application for subsequent prints.
- Achieving Different Effects:
- To create texture, experiment with different carving techniques. Vary the depth and direction of your cuts to add visual interest to your prints. It is a good idea to carve a block trying out different kinds of mark making for reference.
- Explore different types of paper, such as textured or handmade paper, to enhance the visual and tactile qualities of your prints.
Remember, practice is key to improving your skills in relief printmaking. Start with simple designs and gradually challenge yourself with more intricate compositions. Don’t be afraid to experiment, make mistakes, and learn from them. Enjoy the process and remember that each print will improve as you learn more from experience.
I hope this introduction gives you an overview of printmaking, and helps give you some pointers on how to get started in this fantastic medium.
If you decide to start printmaking, remember that patience, practice, and perseverance are key. It may take time to master techniques, understand ink distribution, and achieve consistent results. Don’t be discouraged by mistakes or challenges along the way. Instead, view them as opportunities to learn and grow as an artist.
So, gather your tools, set up your workspace, and dive into the fabulous world of printmaking. Enjoy the process, trust your instincts, and start making some prints!