Back in the summer, my mum and I signed up for a printmaking course with our local creative art community. I’d dabbled in Lino cut years ago, and made about 2 blocks, which I used to make the grand total of a birthday card from each, and the ink, Lino, brayer, cutting tools etc., got put away in a bag, and forgotten about.
Anyway, cut to the present day, and I am still hugely intrigued by the art of printmaking, and so we jumped in! The course is broken into 10 x 3 hour workshops, covering lots of different techniques. So far we have created a 2 block woodcut, a jigsaw Lino, and this week we started drypoint etching.
It is so much fun! I am loving spending this time with my mum, but it’s also incredibly inspiring and stretching me creatively.
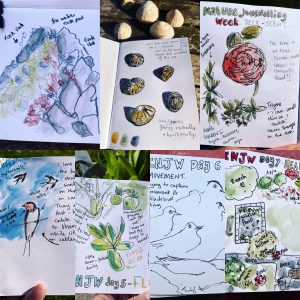
The work so far:
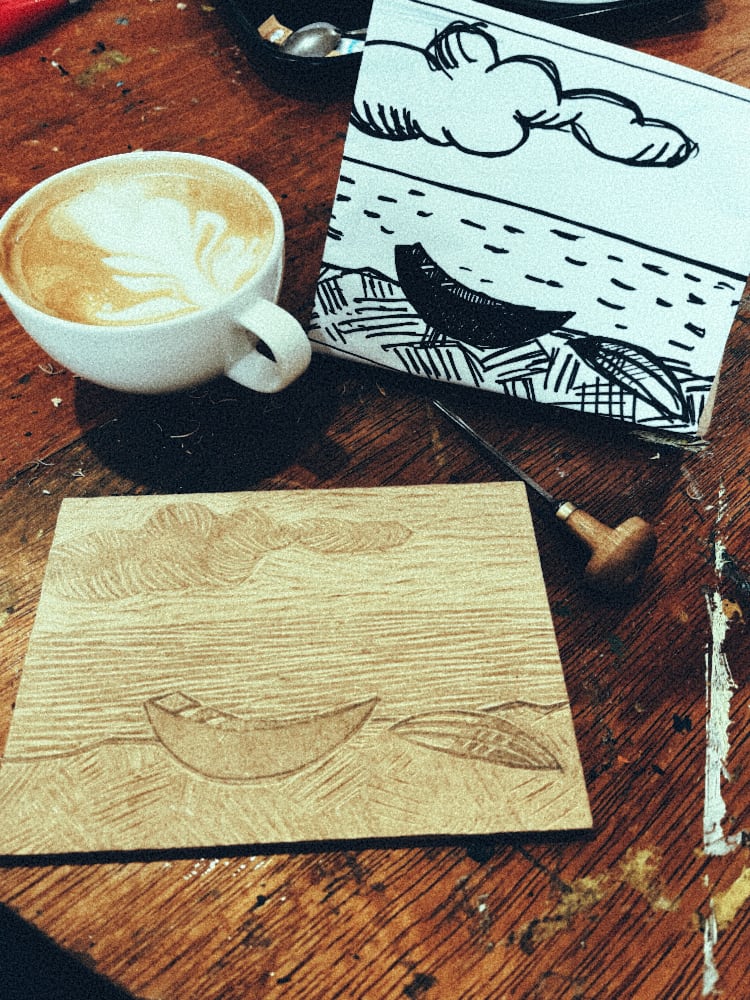
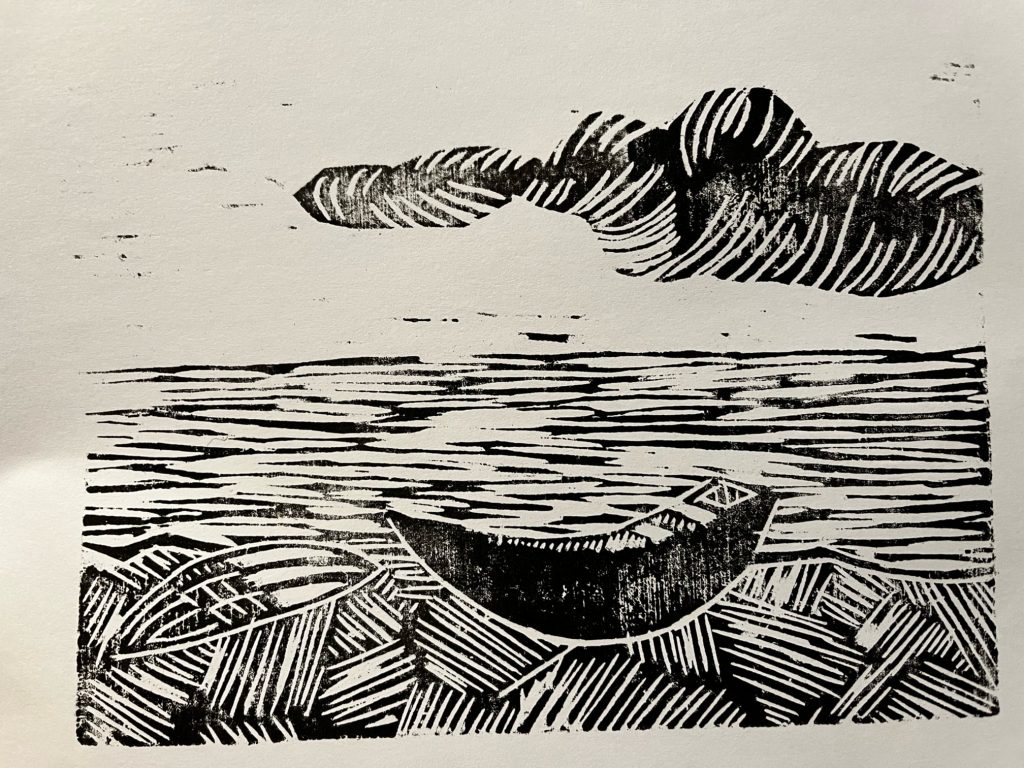
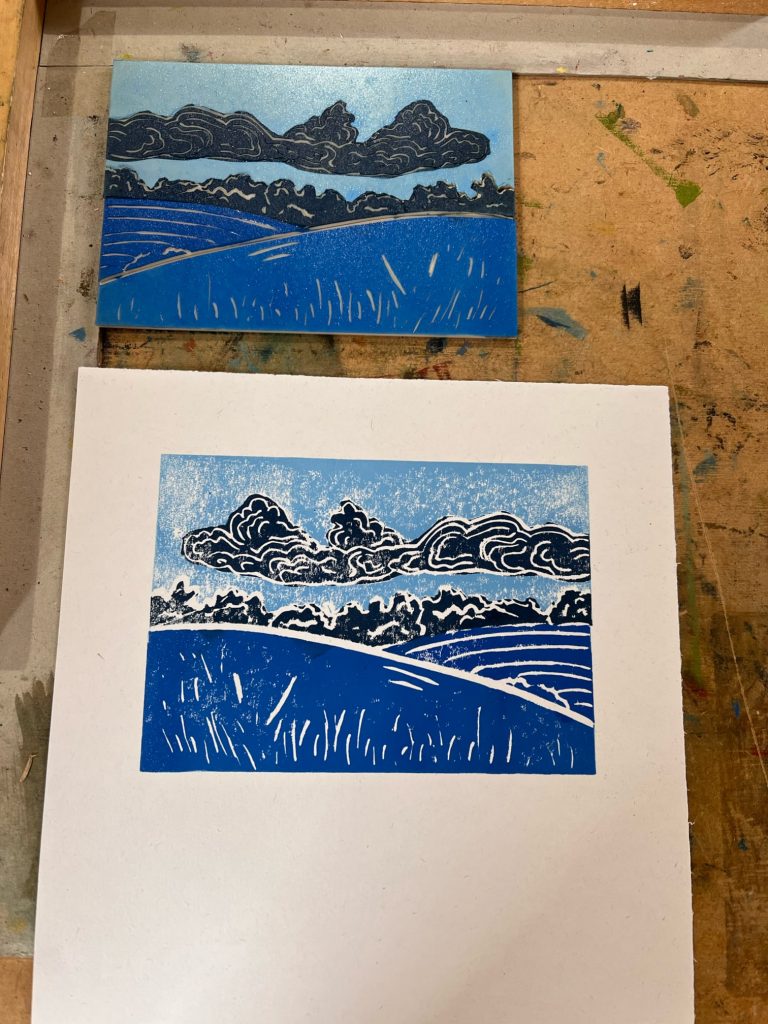
My first wood cut – this is the ‘key block’ which is generally the line work. I adapted this from a sketch in my sketchbook, and found it incredibly hard to visualise how it would look. The first two weeks of the course felt really hard – a massive learning curve and a new experience being back in a ‘classroom’. Mum and I both felt exhausted after the morning workshops!
By the 3rd and 4th week, we were settled in, and absolutely loving every minute – now, with a little experience of carving, inking, registration etc. not everything felt so brand new and it was becoming easier to imagine how our work may turn out. Our tutor is also really great at encouraging experimentation, and it is fab to just be giving this all a go and learning along the way.
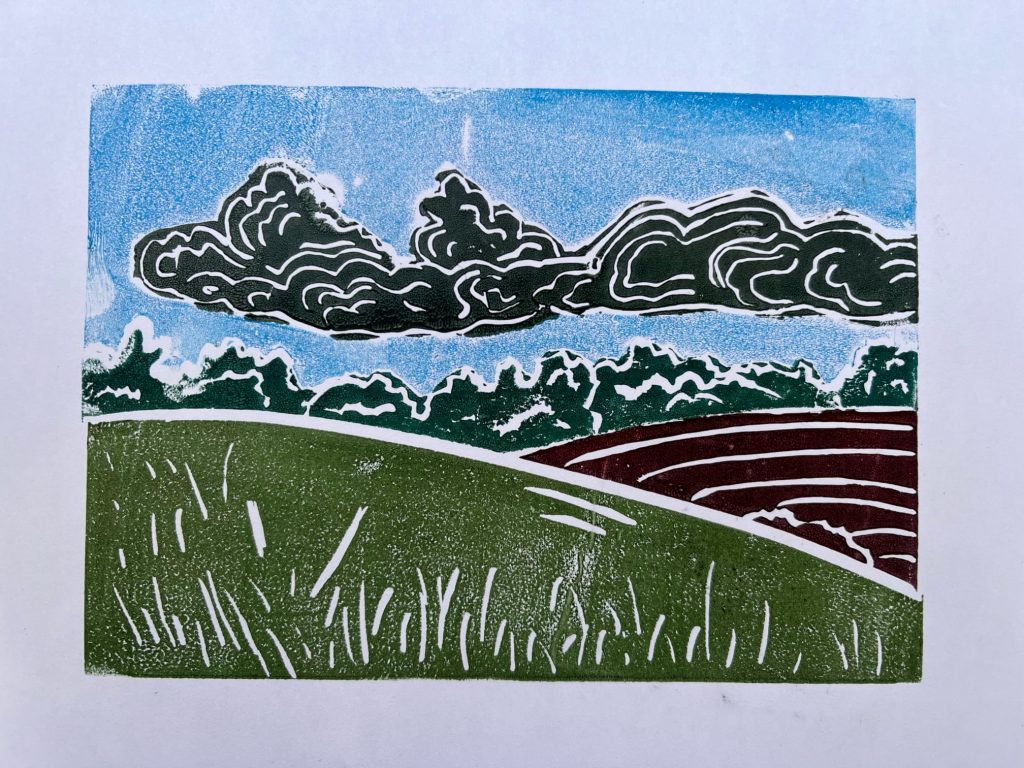
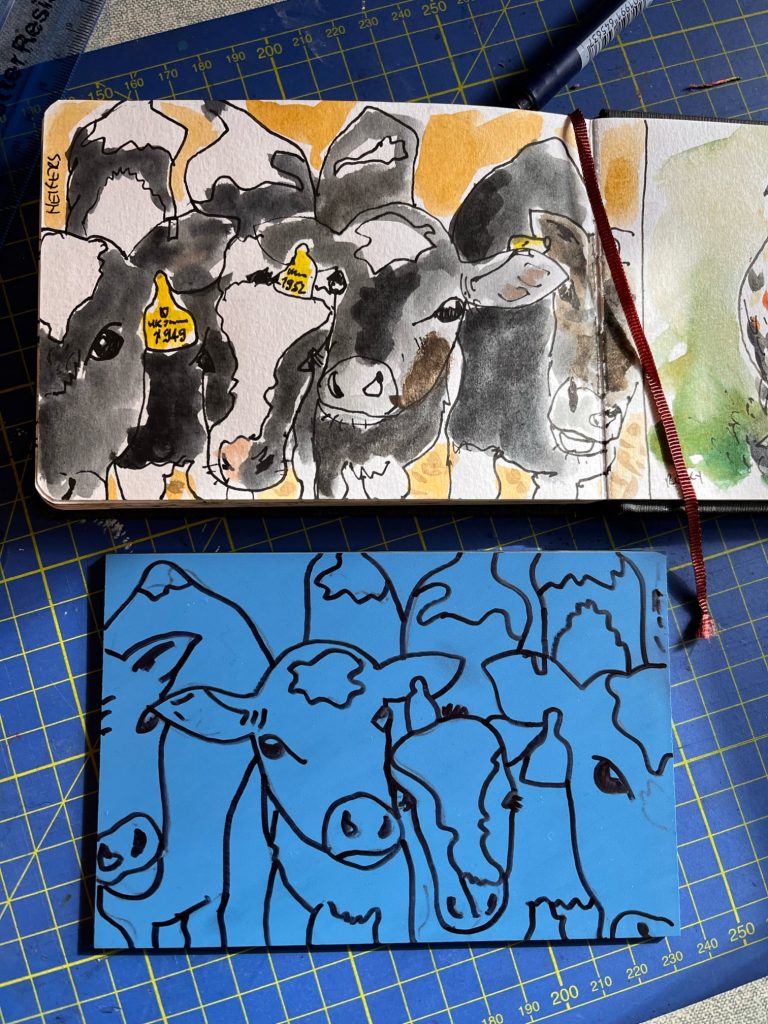
The carving of the Lino felt easier than the wood blocks, but I was too heavy-handed at first, on the softer medium. I really enjoyed learning about jigsaw techniques for Lino, and was really pleased with how my first effort turned out.
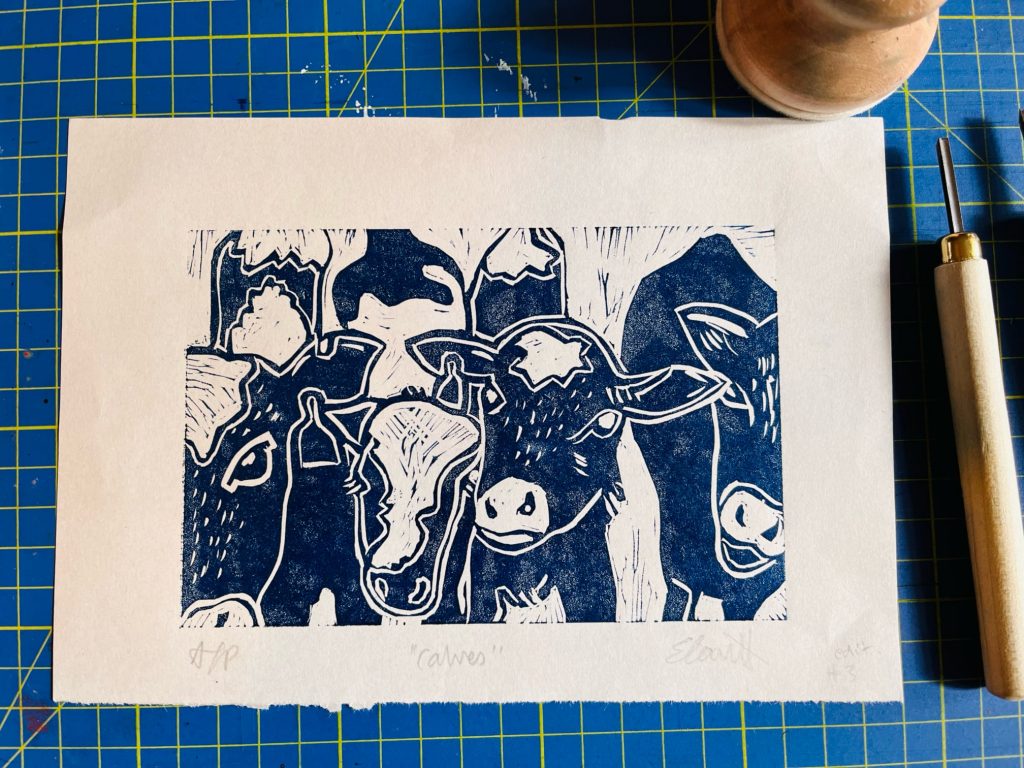
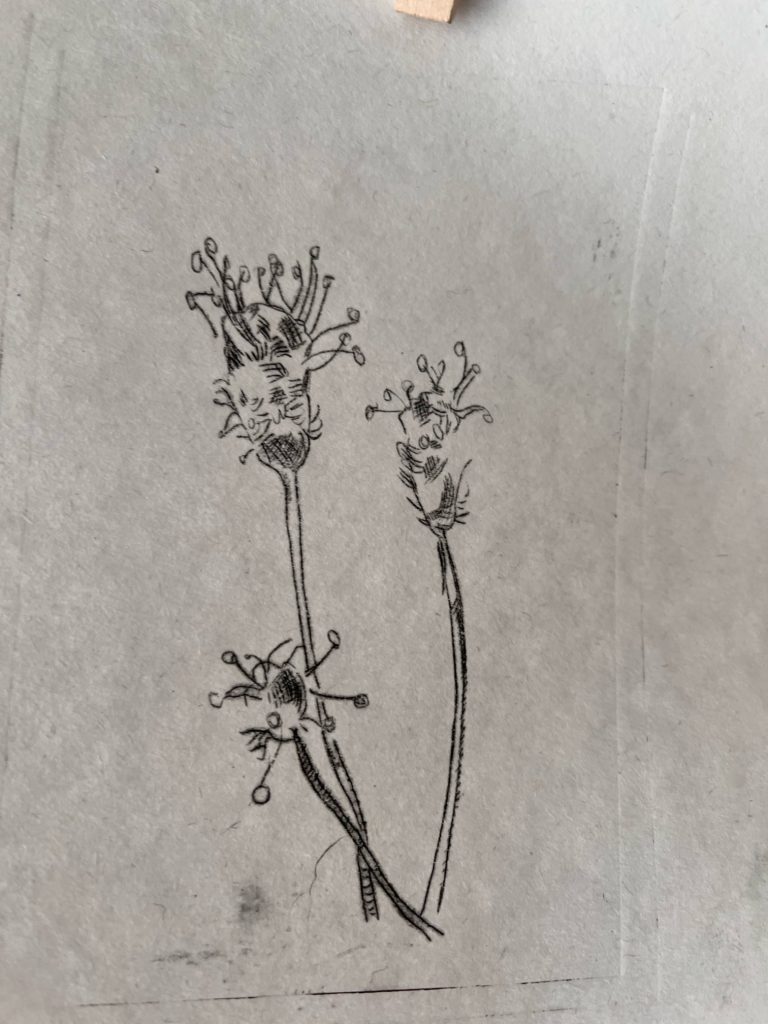
Now armed with equipment at home, I set about starting a new print project, of an image of some calved from my sketchbook. At first, I considered a jigsaw piece, but after a test print, I decided to just keep it simple and a one colour print!
I love I can create pieces from art in my sketchbook – it gives me even more motivation to sketch, and now when I do, I am thinking of possible printing outcomes too!
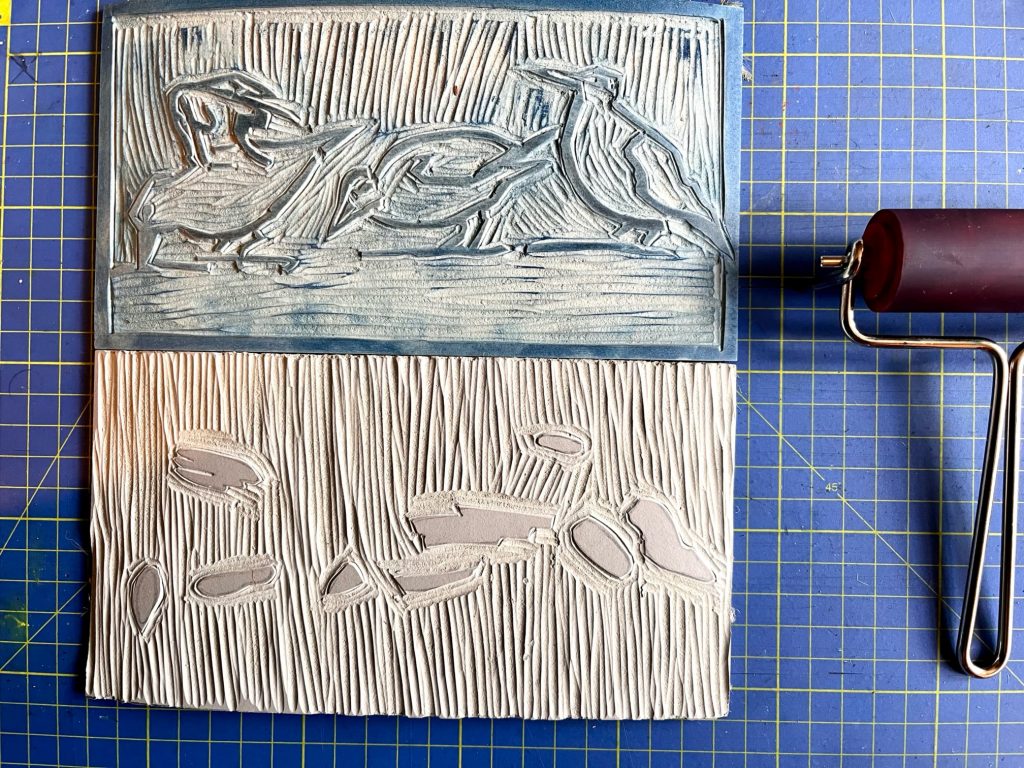
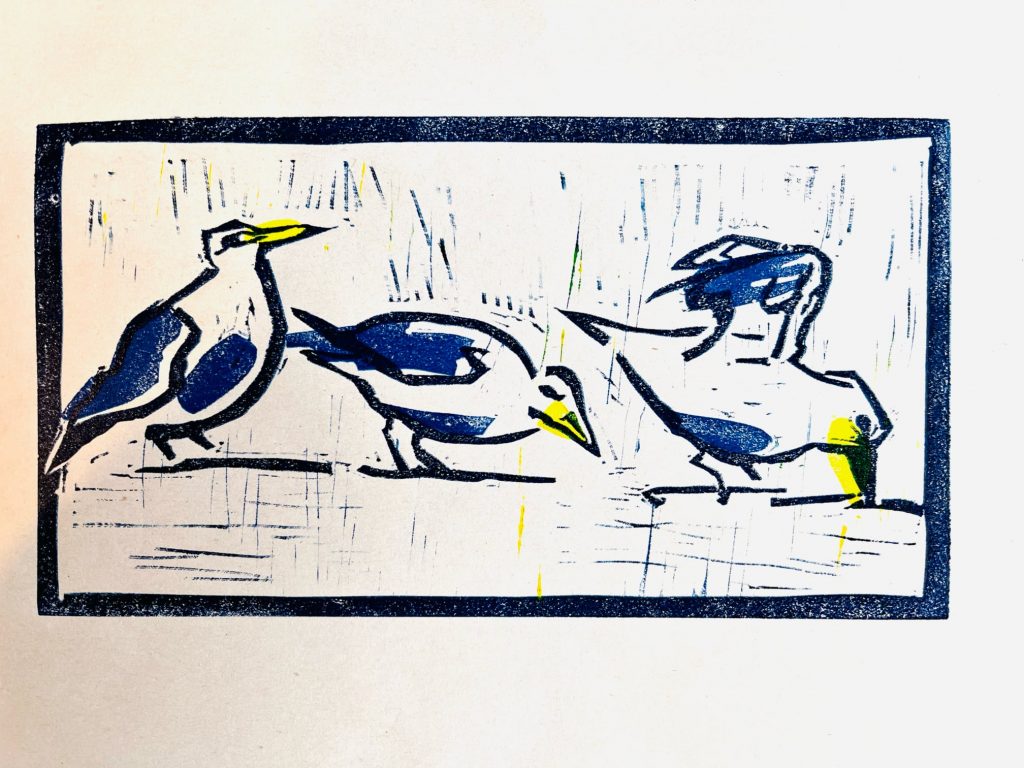
Creating another block at home, from a quick sketch of a seagull I’d made while waiting for my boys at school pick up.
So far I am thrilled with my projects at home, and plan to print some for Christmas presents ☺️
This week, we looked at Dry Point printing, which is totally different because you etch away areas of the block, and those bits get inked, rather than the relief printing on Lino and wood, where the parts you leave get inked.
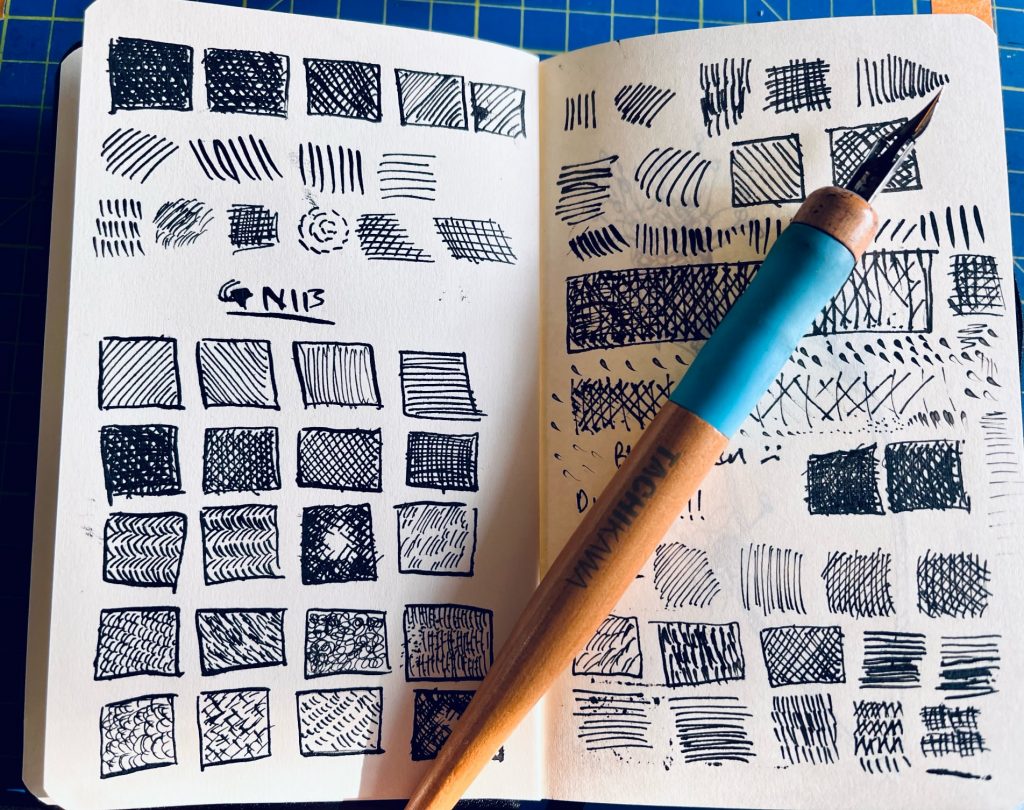
Our tutor, Adam Grose suggested we look at, and experiment with hatching and crosshatching, which was fun to do ahead of the workshop. I haven’t really used cross hatching much in recent work, and it is a great technique, so I think this will get me practising it again more in the future! I am already filling sketchbook pages with hatching studies!
During the workshop, we got to try the technique out. We used a thin sheet of plastic, called Rhenalon, to lay over our sketch, and simply scratched away at the surface with an etching needle.
It’s tricky to see what you have done, so you have to hold it up against a light, or slip a darker sheet of paper between to see what you’ve done. You can also rub crushed chalk into the etched lines, to get a preview of what you have etched.
Once we were happy with the etched image, we were shown how to ink up the plate, using a fabric called tarletan (much like a net curtain). First rub the ink allover the plate, then get a cleaner piece of the fabric, and rub away the excess ink, leaving only the etched area inked. It helped to finish this process off with a flat sheet of newsprint, just to get the last bits of ink off.
Whilst inking up, we had to put a sheet of paper into a bowl of water to soften it up, drying it between two sheets of cloth to take out the excess water before printing. This is to help take up the ink during the printing process.
To print the image, we got to use a Fome etching press, which was great! I can see one of these going on my Christmas list!! Although they are rather pricey.
I really enjoyed this technique. It’s nice to be using hatching and achieving a more sketchy style. Looking forward to exploring this technique more in the next workshop!